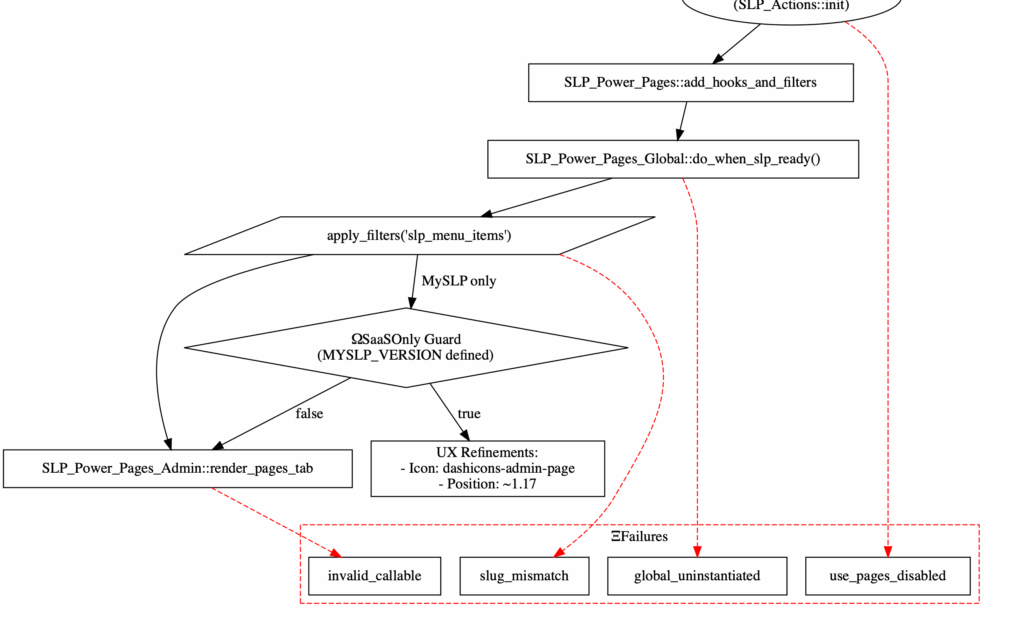
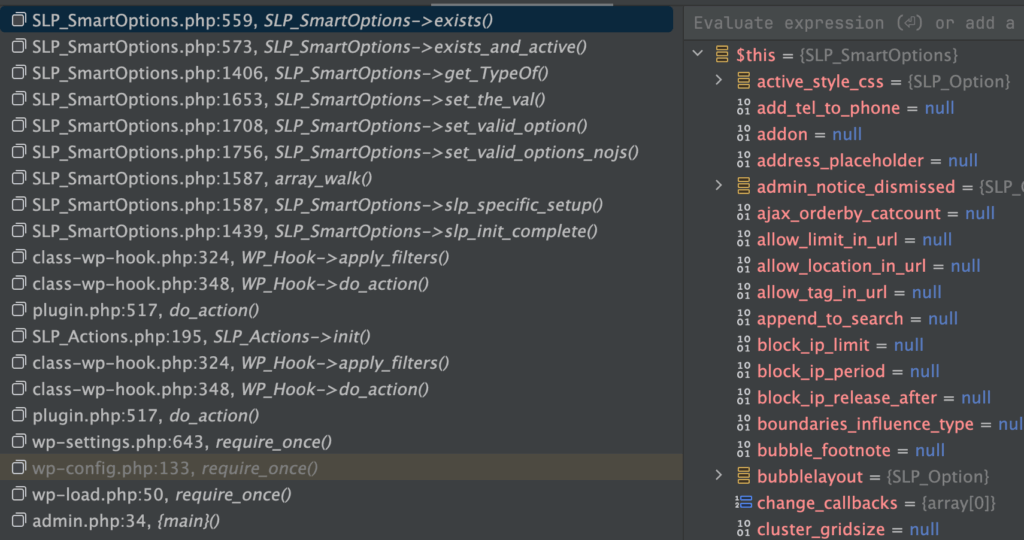
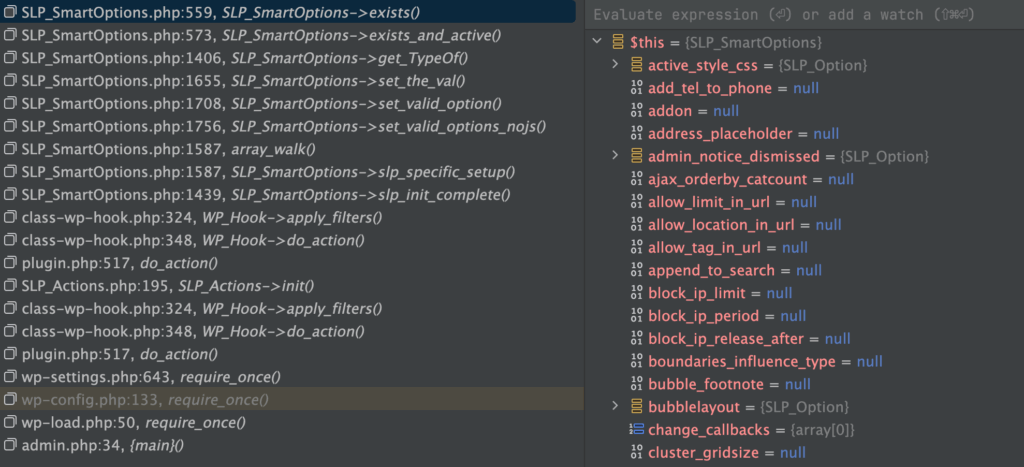
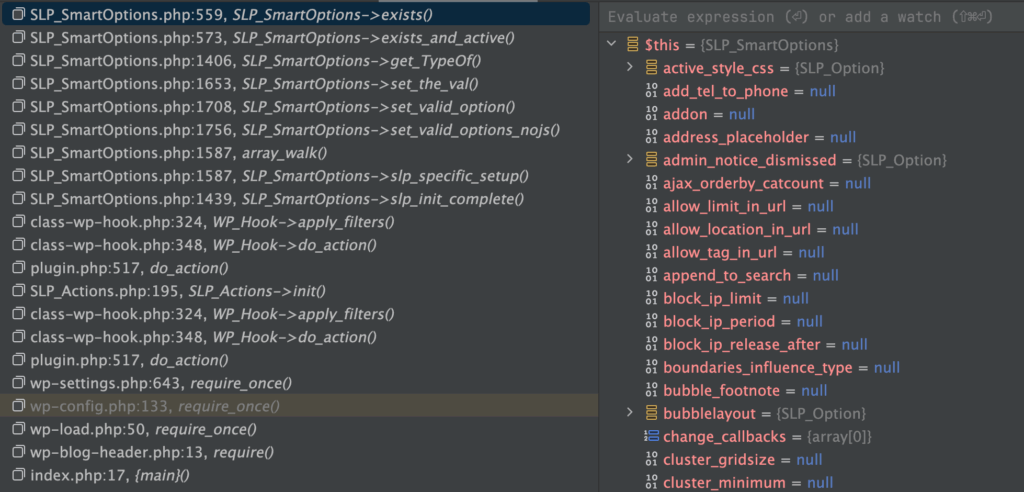
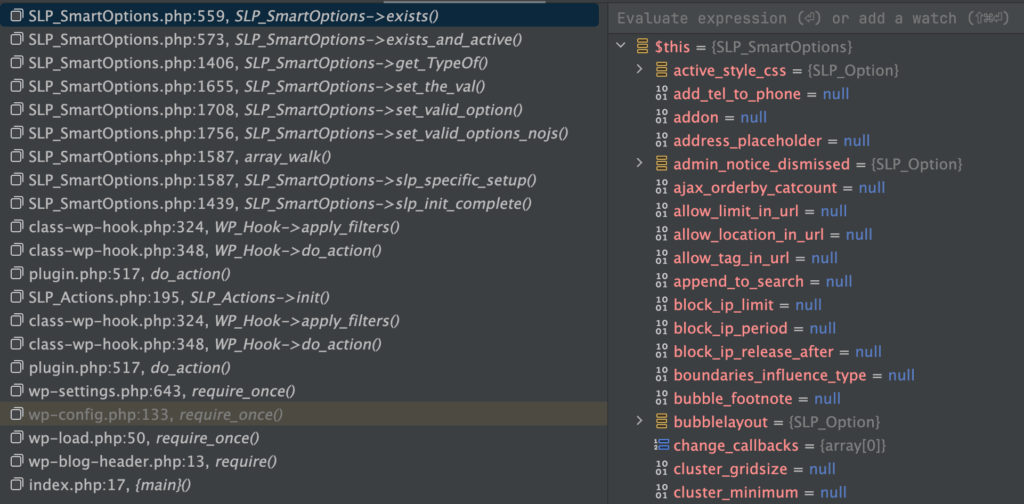
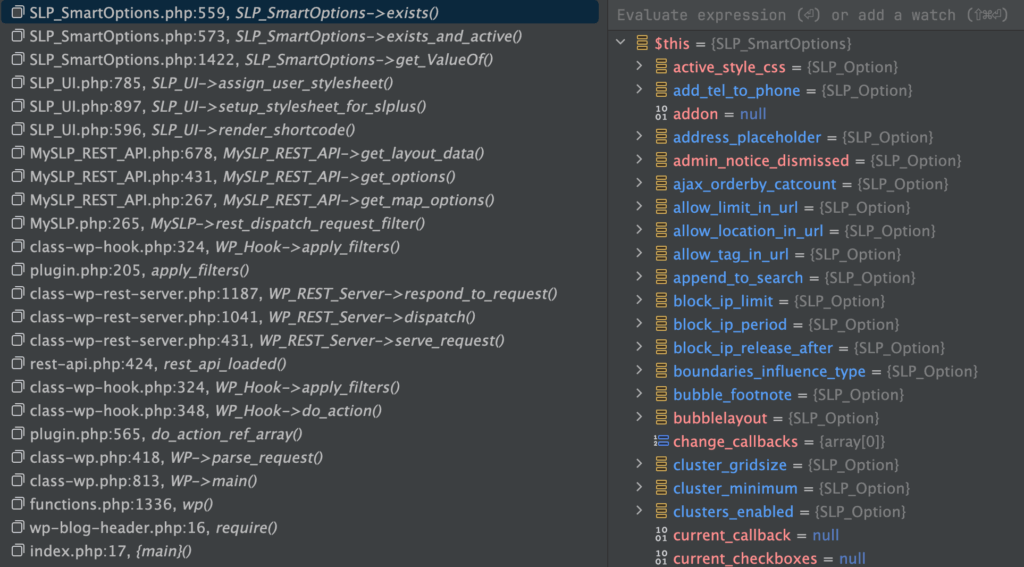
When tracing the settings for active_style_css, it looks like it is loading multiple times… need to investigate later for possible performance improvements.
If you change settings in Staging , Under Map or View get errors , example:
Deprecated: Calling get_class() without arguments is deprecated in
mu-plugins/store-locator-plus/include/module/admin_tabs/SLP_BaseClass_Admin.php on line 592
Reproduction
Login or switch to Feeding America San Diego on local develop (or staging)
Select a new Locator Style (“Feeding America”)
Click Select
Dev Notes
Added get_class($this) to the method in SLP_BaseClass_Admin on line 592 as required by PHP 8.
Fires once activated plugins have loaded. The hook is generally used for immediate filter setup, or plugin overrides. The plugins_loaded action hook fires early, and precedes the setup_theme, after_setup_theme, init and wp_loaded action hooks.
Sets up the slplus->database object with slplus->database = SLP_Data::get_instance(). This needs to happen AFTER the WoredPress:set_current_user is called so MySLP has the proper user meta to set the database attributes.
\SLP_REST_Handler::valid_referer() for any site that is not coming from get_site_url() or get_home_url(). This is run via the WordPress REST API handler via the register_rest_route() for the readable request for geocoding at the wp-json/store-locator-plus/v2/geocode/<address> endpoint. This happens via the permission_callback property.
Recently stood up a new ECS container for the Store Locator Plus® staging app. We can connect to the app and login, but the app cannot talk to the outside world. It is not connecting to WordPress news service and cannot validate a WP SMTP Pro license.
You are using the awsvpc network mode. This means that each ECS task gets its own Elastic Network Interface (ENI). With this configuration, the ECS tasks do not use the underlying EC2 instance’s network connection, they have their own network connection, with their own IP addresses.
You are currently disabling public IP assignment to your ECS tasks in the ECS service network_configuration block. You will need to change assign_public_ip to true in order to have ECS assign public IP addresses to the ECS Task’s ENIs, so that the ECS tasks can access resources outside of the VPC.
I forgot you can’t use public IP with awsvpc ECS deployed to EC2. You can only do that with Fargate deployments. So your options are to use a different network mode, so you can use the EC2 instance’s public IP from your ECS task: docs.aws.amazon.com/AmazonECS/latest/bestpracticesguide/… or switch to private subnets and a NAT Gateway.
“An internet gateway enables resources in your public subnets (such as EC2 instances) to connect to the internet if the resource has a public IPv4 address or an IPv6 address. “
Add a route to the route table for the subnet that directs internet-bound traffic to the internet gateway.
Ensure that instances in your subnet have a public IPv4 address or IPv6 address. For more information, see Instance IP addressing in the Amazon EC2 User Guide.
ECS instances using AWSVPC have no public IP address on the running instance/container and thus cannot route through the Internet Gateway despite it being on the VPC and subnet where the EC2 instance and container are attached.
Resolution Summary
To resolve this issue, we need to separate the subnets for your ECS tasks and the ALB, and configure the routing appropriately.
Keep Existing ALB / IG Subnets Unchanged
Keep the existing public subnet(s) for your ALB unchanged, with the Internet Gateway attached.
myslp-staging-alb
DNS Name: myslp-staging-alb-1533129727.us-east-1.elb.amazonaws.com
Internet Gateway: slp-cluster-gateway (igw-ab3d34cf) attached to slp-cluster-vpc
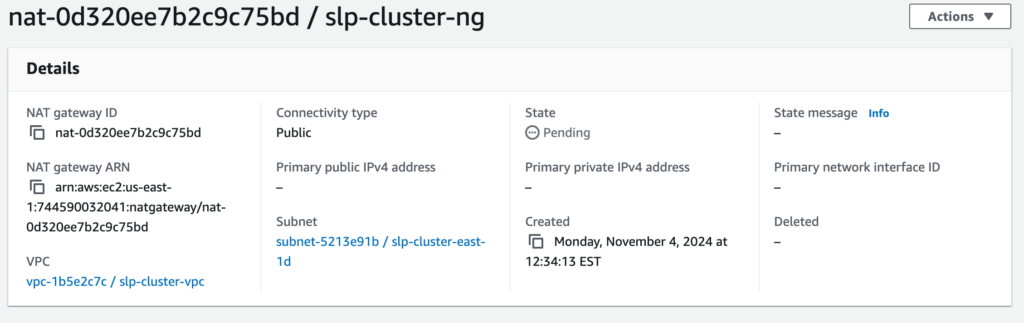
Create A NAT Gateway
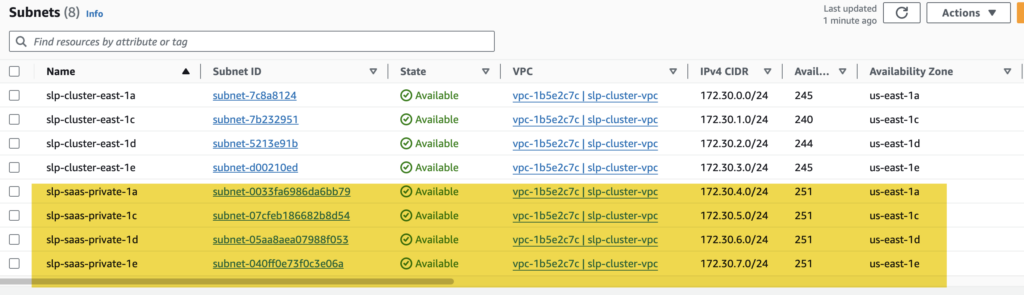
Create New Private Subnets To Match The Public Subnets
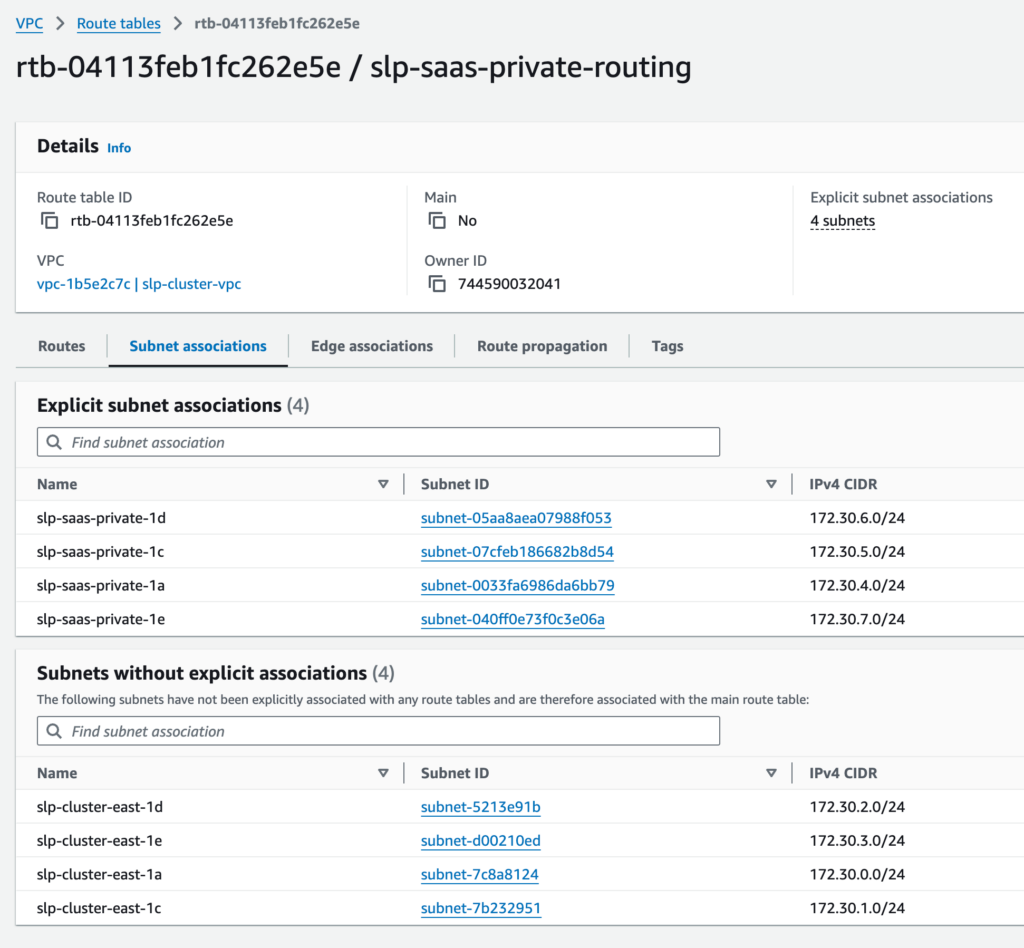
Create A New Route Table And Associate With The Private Subnets
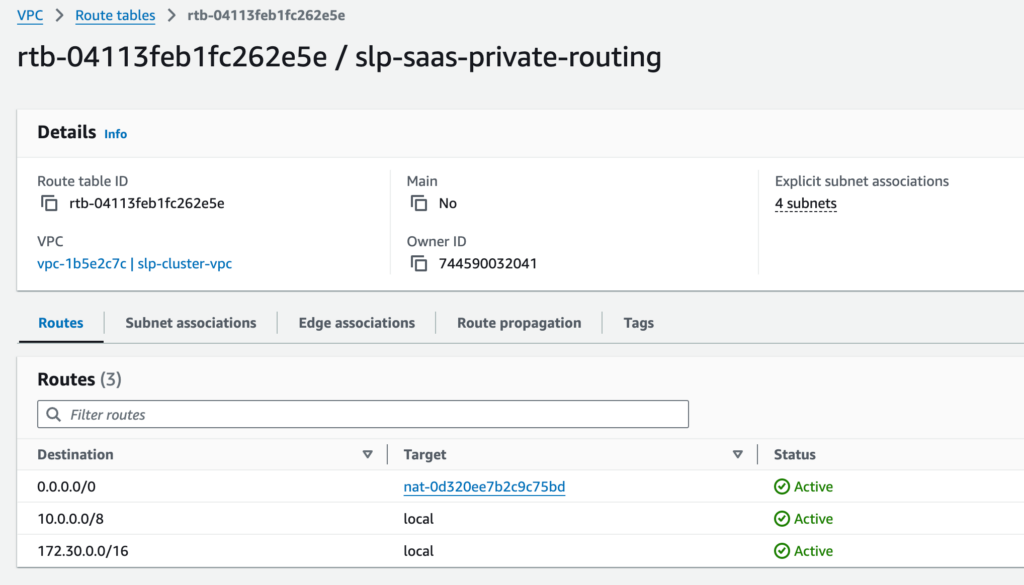
And add a route to the general internet (0.0.0.0/0) that goes through the NAT gateway.
ECS Service Changes
Note: You cannot update the network configuration of an existing ECS service. Therefore, you need to recreate the service.
Put the new service on the private subnets only.
Autoscaling Group Updates
Update the auto scaling group to add the private subnet with the NAT gateway.
Resolution Summary
The container using AWSVPC will not have a public IP address. That means the automatic routing for outbound connections will never use the Internet Gateway.
You need to setup a VPC with a public subnet (we have 4 zones , A C D E) and private subnet in those same zones.
The cluster will setup an automatic scaling group, something like Infra-ECS-Cluster….* which will define the Auto Scaling group via the infrastructure subcomponent of the cluster.
The Auto Scaling Group(ASG) needs to include both the private and public subnets.
The EC2 instances it spins up can be in the private subnet (let ASG decide).
The cluster service will setup the application load balancer (ALB) and target group. The service must be placed in the private subnet only. This will ensure the subsequent tasks (container instances) run on the private subnet. The ALB that is created must be assigned to the public subnets on the VPC to allow general inbound traffic from the internet to find its way over to the container on the private subnet. As a side note, the target group listens on HTTPS port 443 and routes to the container HTTP port 80. Use the service to create the ALB and target groups.
On the VPC…
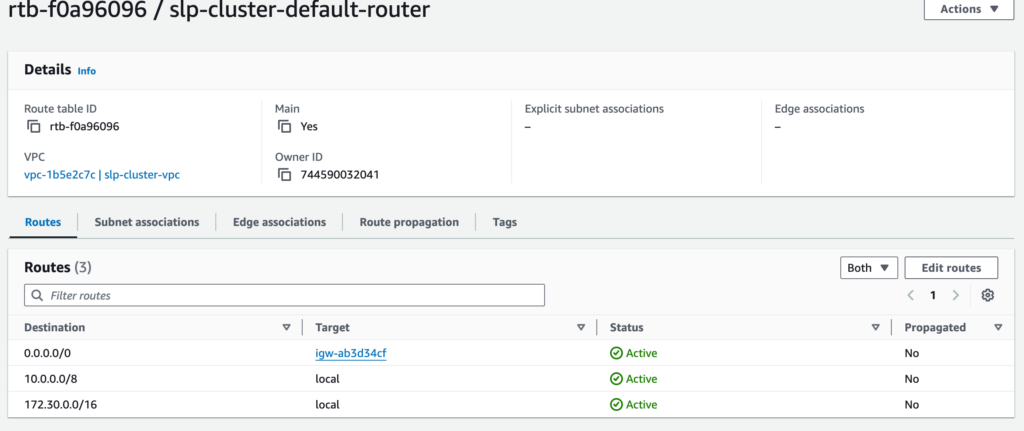
Make sure the default routing table is explicitly assigned to the public subnets and NOT the private subnets.
Create an Internet Gateway (IG) and attach it to the VPC. This will allow inbound traffic from the internet to any service on the VPC with a public IP, in our case the application load balancer listener on port 443.
Create a NAT Gateway. Assign all the private subnets to be part of the NAT Gateway.
Create a second routing table and assign the private subnets to this table. Add a route to 0.0.0.0/0 that goes through the NAT Gateway.
If there are any tasks, containers, or EC2 instances already running stop and reinstantiate each of them. If the service was created originally on the public subnet of the VPC it will need to be deleted and recreated on the private VPC subnets.
This process is for updating the staging Store Locator Plus® SaaS server running on an ECS cluster after performing code updates.
These processes require a locally installed copy of the MySLP AWS ECS Kit repository which can be found at ssh://git-codecommit.us-east-1.amazonaws.com/v1/repos/myslp_aws_ecs_kit.
Edit your code or deployment kit files first. This can include WordPress plugins or themes, the Docker composer or image builder commands, helper scripts, or various configuration files used to manage and deploy the Store Locator Plus® SaaS container images.
Once your updates are ready, make sure the WordPress stack is up-to-date by updating the submodule links, then commit all of your updates to the MySLP AWS ECS Kit repository on the proper branch. There are AWS CodePipeline services running that will monitor the repository for changes, build any images as needed with ECR and deploy them via the Elastic Container Service if possible. Details on the processes are noted below.
Update The Submodules
From the MySLP AWS ECS Kit git project root:
./tools/create_mustuseplugins_stubs.sh
Commit The Code Updates To The Repo
Commit any changes to the MySLP AWS ECS Kit repository.
When you push the changes from your local develop, staging, or production branch an AWS listener service will detect the code changes and run Code Pipeline tied to services such as CodeBuild and ECS to deploy the final Store Locator Plus® SaaS container in the AWS cloud.
Commits to local branches will not trigger a change in the AWS deployments.
Commits to any branch not specifically named develop, staging, or production will not trigger changes in the AWS cloud deployments.
CodePipeline Notes
The CodePipeline that is configured to deploy the staging containers is named myslp-webserver-staging-pipeline.
Stage: Source
The pipeline monitors the staging branch on the AWS CodeCommit repo for the MySLP AWS ECS Kit project at ssh://git-codecommit.us-east-1.amazonaws.com/v1/repos/myslp_aws_ecs_kit
Stage: Build
The source will be read from the URL above and a series of commands will be executed in the cloud to create an container image. This image is stored in the AWS Elastic Container Registry as a private image.
The Store Locator Plus® SaaS (internal name: MySLP) container images are stored in the 744590032041.dkr.ecr.us-east-1.amazonaws.com/myslp2024-aarch64 docker image repository.
Staging branches will tag the latest build with the :staging tag.
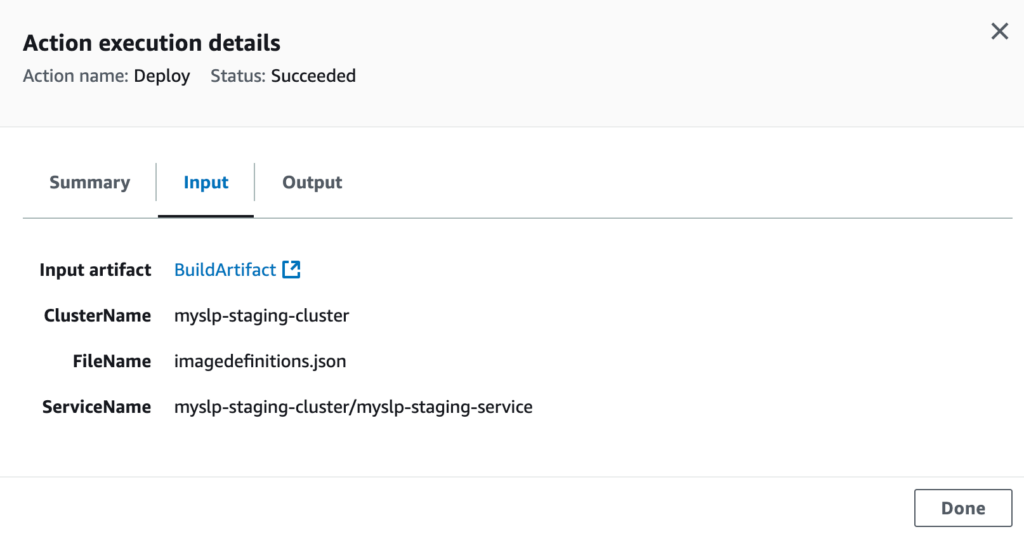
Stage: Deploy
The deploy stage will execute if the build stage completes successfully. This stage will attempt to take the latest myslp2024-aarch64:staging ECR image and launch an active container in the AWS Elastic Container Service.
The deploy stage will attempt to launch a running container in the myslp-staging-cluster on the myslp-staging-service service within that cluster.
We use a 20-site pro license to manage email on the new server clusters via the WP Mail SMTP Pro service.
You will need to network activate the plugin and get the site license key to enable it.
Use Amazon SES service to send email. To configure you will need the Access Key and Secret Access key to set this up. These are in Lance’s password manager app — or you will need to create a new identity under the storelocatorplus.com domain in SES and create a new key pair.
The locator layout should be able to set any setting in SLP.
The Default Locator Style was updated to change “label_phone” from “Phone” to “Phone ” on the main Store Locator Plus® site (this is managed in the Premier Services plugin).
Problem
Setting the label_phone with a space at the end is not making it to the settings on a user site. It appears as though trim() is being called when the data is recieved.
Research
Cannot reproduce after fixing some JavaScript errors on the admin processor.


